Tips Up Tuesdays: How To Patch a Jacket
 Have a hole in your favorite jacket? Learn how to patch it:
Don’t toss a jacket just because it has a hole. Patching it is quick, easy and keeps gear in use longer. This step-by-step guide shows how to clean the fabric, choose the right patch and apply it properly for a long-lasting fix.
- Cleaning the damaged area first helps patches adhere and last longer.
- Tenacious Tape and Gore-Tex patches are ideal for most shells and puffy jackets.
- Rounded patch edges prevent peeling and make repairs more durable and waterproof.
_______________________________________________
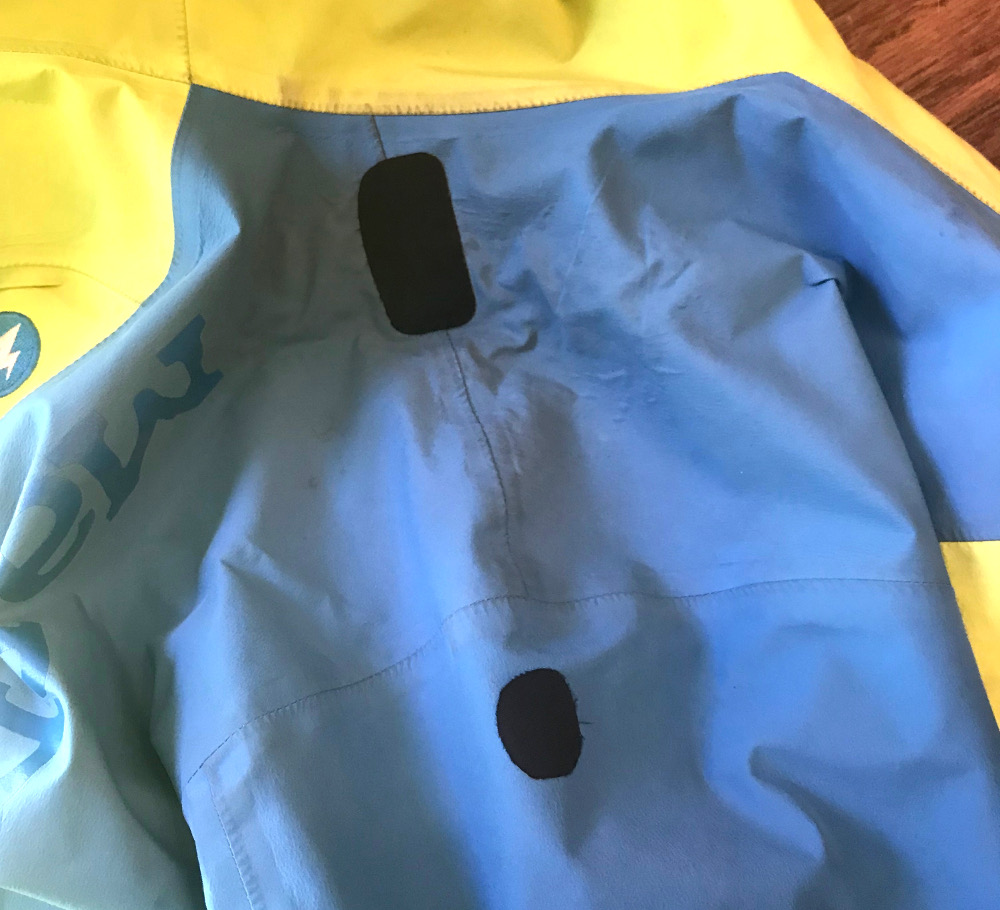
I’ve lost count of the number of ways I’ve put holes in my jackets over the years. Tree limbs and snags are typical culprits, but I’ve had my share of burning encounters with stray embers. One time, I had a GoPro rip a hole in my pocket after an unintended tomahawk. Regardless of the mechanism, my fix for a ripped jacket is usually pretty standard. Lots of folks have their own opinion on this matter, so if you feel like you’ve got an addition, leave it in the comments below.
Another noteworthy point is that this tutorial is mostly for nylon shells and puffy jackets. If I get a hole in a fleece jacket, I don’t usually bother with it. I may use some sewing skills for larger rips in fleece, but those tend to be rare.
Step 1: Clean the Area
Cleaning the area is an often-overlooked step that can really help with the rest of the process. I’ll usually mix a solution of Nikwax Tech Wash and water in a cup and use a rag or cloth to wipe down the tear and the surrounding area. You don’t need much Tech Wash for your solution. Usually, a few drops will satisfy. After you’ve washed it with the soap solution, try to rinse it with water and dab it dry with a rag or paper towel.
Once you’ve gone through this step, let it sit and dry.
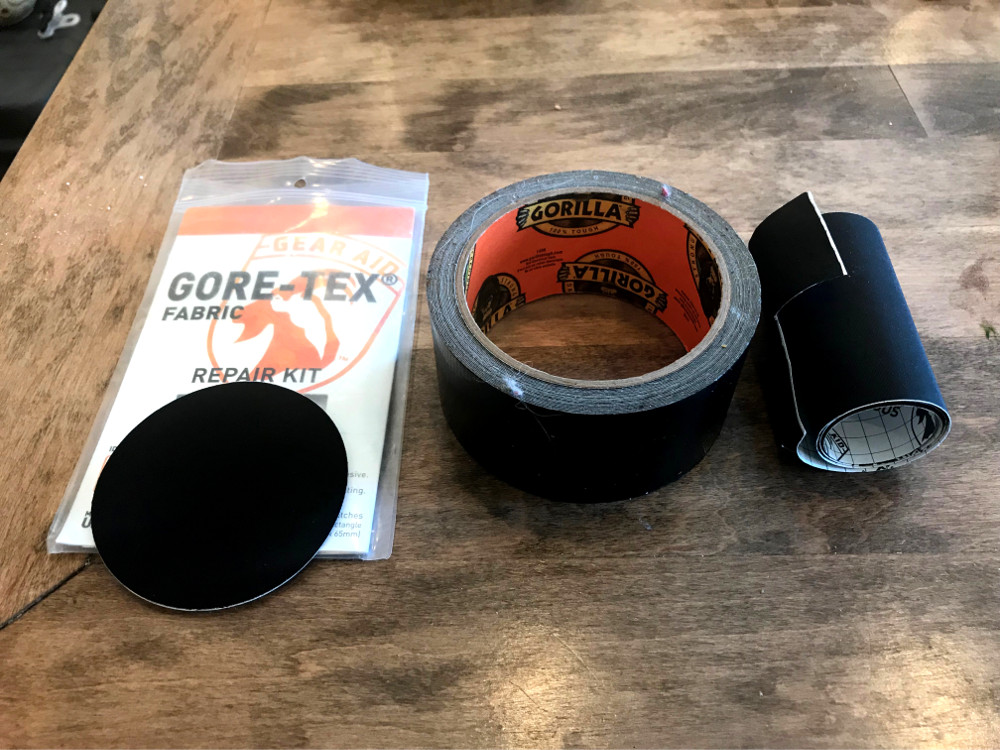
Step 2: Pick a Patch
Everybody’s got their favorite patch. The standards in the outdoor industry are typically duct tape or Gorilla tape. These two options are great in the field, but the edges tend to peel up and leave residue on your garment if they ever come off. You do get some bonus dirtbag points for having duct tape patches, and it does come in some awesome patterns, but I usually go with Tenacious Tape or Gore-tex Patches. Both are packaged by Gear Aid/McNett and should be easy to find at your local outdoor retailer.
Tenacious Tape comes in different colors, including a clear version, so it should be easier to find a color match to your jacket. I like Tenacious Tape for puffys, softshells, or anywhere where waterproofness isn’t an issue. That being said, the clear version seems to stick even better to a lot of different fabrics and is waterproof.
Gore-Tex patches come pre-cut in a couple of different sizes, but are usually limited in color. These are great for hard shells like your ski jacket or pants.
Step 3: Trim It
After you pick an appropriate patch, you need to trim it to size. I like to make sure that my patch overlaps the tear by at least 1/4″ on all sides. The next piece is incredibly important.
Clean up the edges of the patch. Circles and ovals stick the best and don’t have annoying corners that peel up, allow in dirt and water, and eventually fall off.
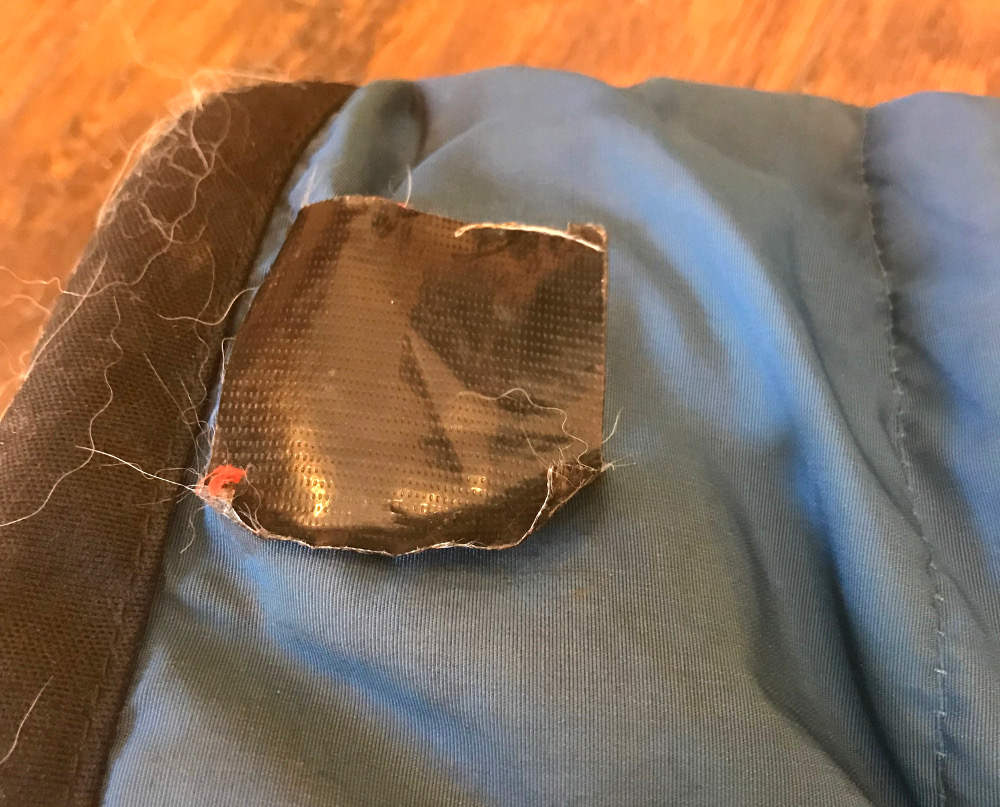
Step 4: Stick It
You’re ready to go. Peel off the backing and stick that sucker on there. After it’s on with no wrinkles, I usually try to press it between some heavy books for a few hours. Voila, back to normal and ready to shred.
